This article describes four effective ways to enable remote desktop access and to restore deleted files remotely if necessary.
Time flies and new versions of operating systems and applications are continuously released along with a lots of malware. Some malicious software can affect the most insignificant aspects of computer performance, while other viruses may cause crashes.

Recover Deleted Files and Repair Corrupted Partitions
Assume you have lost control of the device that stopped responding to mouse movements or keys being pressed. The best solution in this situation would be getting to the nearest computer service company for emergency repair to bring your device back to life as soon as possible. This method is quite straightforward though it will cost you some money. Are there any alternatives?
If you know what exactly caused the problem and you have access to another computer, or if your friend can assist you, consider using such Windows feature as Remote Desktop.
This utility allows you to share control of your computer with a partner so that they can perform all the necessary actions in order to restore your PC to its original state.
Method 1. Start Menu.
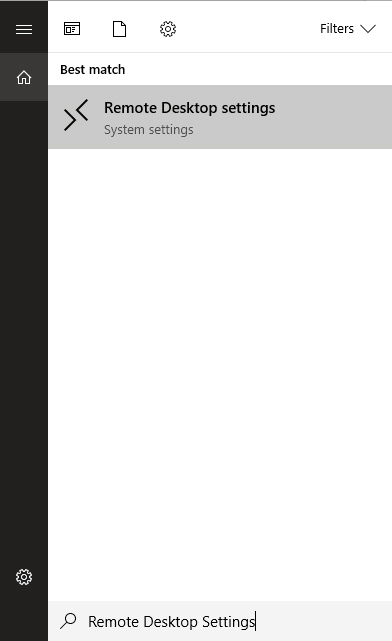
1. Use the Win + Q key shortcut to open the Start menu dialog box and enter the Remote Desktop Settings command. Open the application.
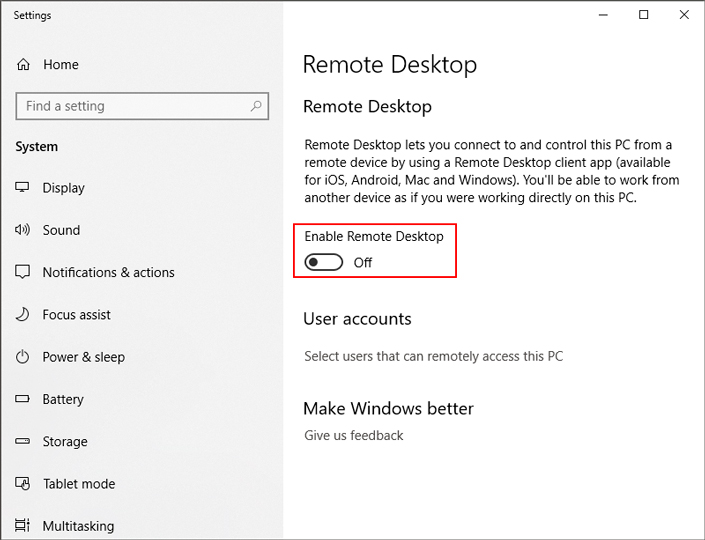
2. Change Enable Remote Desktop option to Active.
Method 2. Windows Explorer.
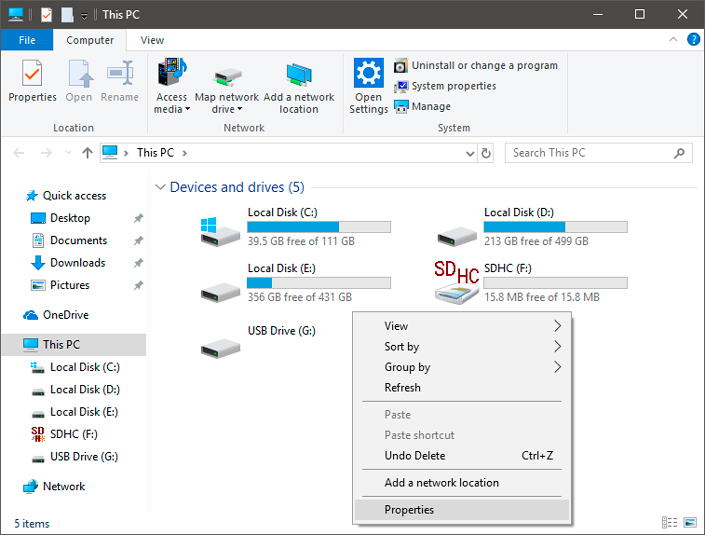
1. Open Windows Explorer. You can also use the keyboard shortcut Win + E.
2. Right-click on an empty area in the window and go to Properties.
3. In the menu on the left you will find a list of Windows recommended options for further work. Select Remote settings.
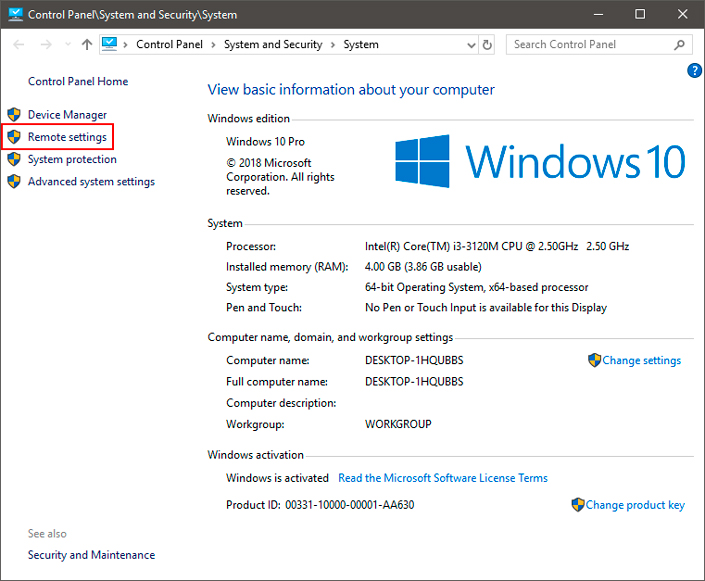
4. Select the Allow Remote Assistance connections to this computer check box.
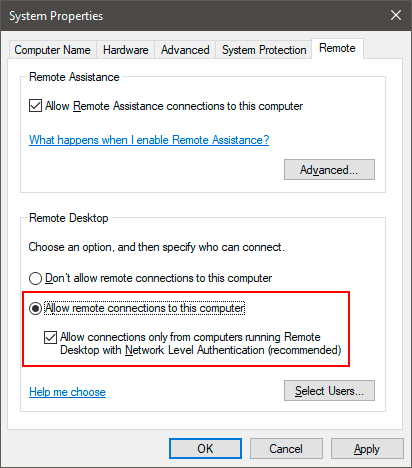
Method 3. Control Panel.
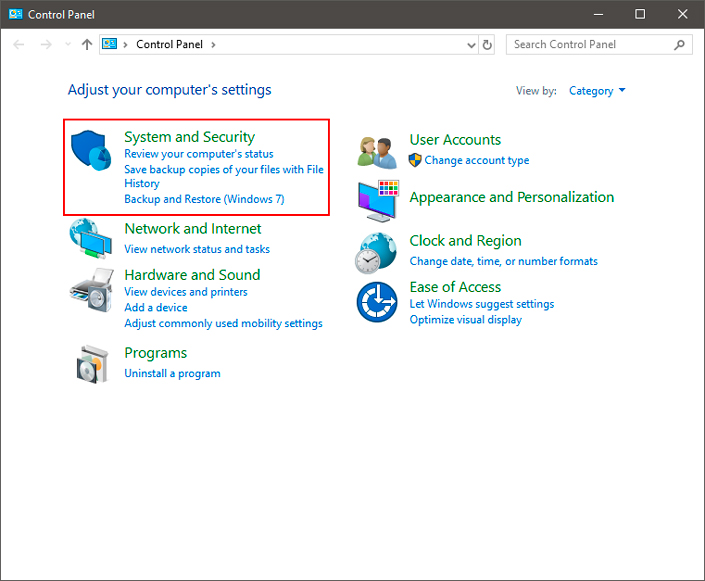
1. Open the Control Panel.
2. Go to System and Security.
3. Click on the System tab.
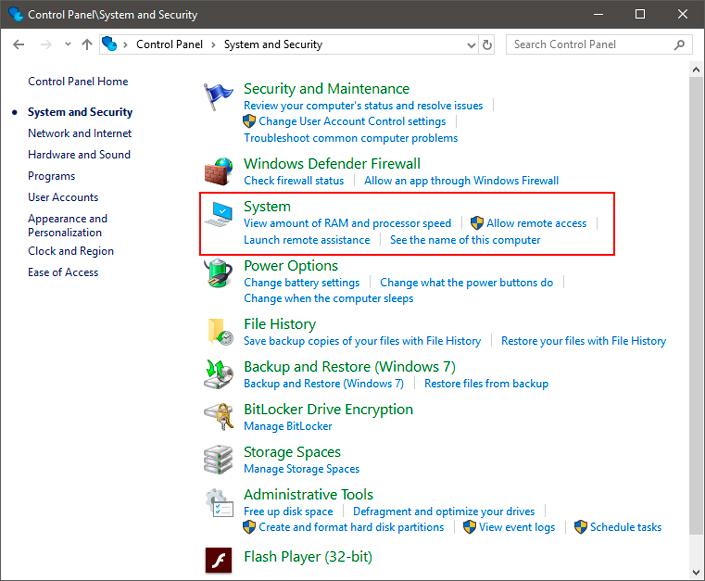
4. Select Remote settings.

5. Select the Allow Remote Assistance connections to this computer check box.

Method 4. Command Prompt.
1. Open the command prompt as administrator.
2. In the window that appears, enter the following command: reg add “HKLM\SYSTEM\CurrentControlSet\Terminal Server” /v fDenyTSConnections /t REG_DWORD /d 0 /f

Now you have full access to the remote desktop.
3. Now type: netsh advfirewall firewall add rule name = “allow RDP” dir = in protocol = TCP localport = 3389 action = allow
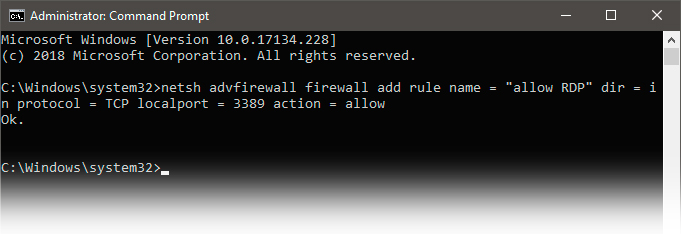
This action opens the firewall port.
Done! Remote Desktop is active and ready for use!
Starting remote recovery session
Above, we have reviewed four effective and commonly used remote desktop configuration methods that work for any version of the Windows operating system. However, that was just the preparation stage.
In this section we’ll look at how to start a remote recovery session.
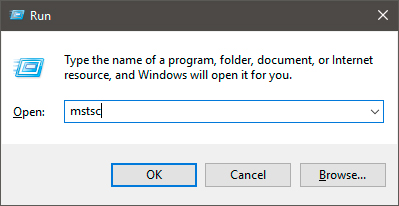
1. Press Win + R to open Run dialog and type mstsc command in the text box. Press the Enter key.
2. In the dialog box, type the computer’s IP and press the Connect button.
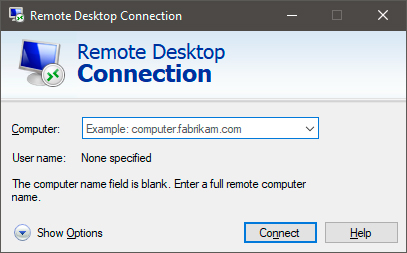
3. Follow the operating system instructions.
Remote file recovery
It is quite a common situation when failures within the operating system or hardware errors lead to a seemingly permanent loss of important documents. In most cases, that is true just until you realize the simple fact – files do not disappear from the computer without a trace.
We will not delve into the file system theory since this topic is quite complex, so we will only give it a brief overview. Imagine that a hard disk is a kind of a library.
While removing any file, the operating system does not erase it literally. This action is impossible. The file system simply “forgets” the path to the “deleted” document. However, it is still located on the shelves of this library.
The most important thing is to understand that you can restore a file only until it is overwritten with another document. Therefore, if your operating system or HDD crashed, do not put your files at risk by overwriting them with new programs, as it can just destroy them.
If you are sure that the document was not overwritten and can be recovered, we recommend trying out Starus Partition Recovery.
The application has an intuitive and user-friendly English interface so you would not need to study complicated manuals. Thus you will get your files recovered in 5 minutes unlike other users who may need much more time for that.
We hope you found this article useful and helped you recover deleted files over the network.




If you want to add anything to this article, or if you are willing to share your personal experience with setting up a remote desktop and restoring data over the network, please leave a comment!