This article tells about the most effective ways to protect your data from deletion and a method to quickly recover files in case of an unexpected loss.
In the modern world, personal computers have become an integral part of all spheres of life. They can be used both at home for leisure activities and in offices for working with various kinds of documents.
Regardless of the purpose of using a PC, the issue of data integrity has always been acute and probably will never leave the leading position in terms of number of similar requests in the Internet.
Files may be lost for various reasons:
- Operating system failure.
- Failure on windows updating.
- Hard drive damage.
- Computer infected with malware.
We have listed only the main situations that could lead to the loss of documents. However, you should keep in mind that there are many of them and the analysis of each separately will require a lot of time and we simply will not be able to consider each.
File history
File history, is an excellent tool supplied in the list of standard applications for all versions of Windows 8.1 and Windows 10 operating systems.
This program allows you to easily automate the backup process of all your files, which will allow you to forget about the possible risk of losing any important documents.
How to find File History? Let’s take a look at the guide below.
1. Open the Control Panel.
2. Go to System and Security.
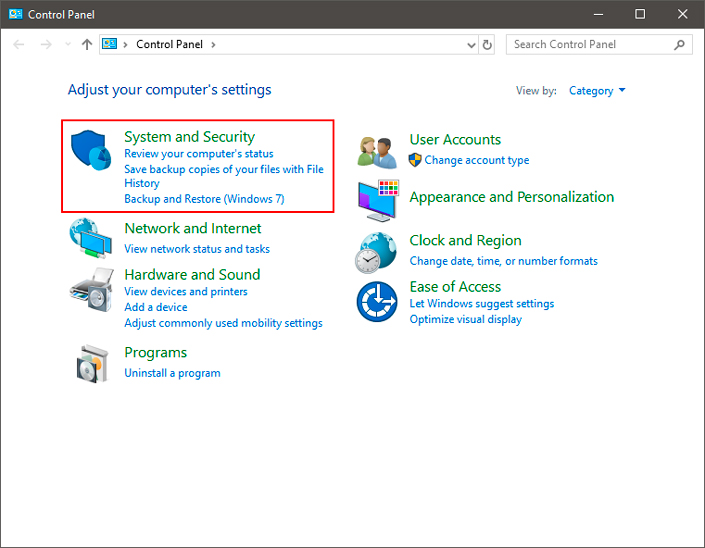
3. Here you can easily find the File History utility. Let’s open it up.
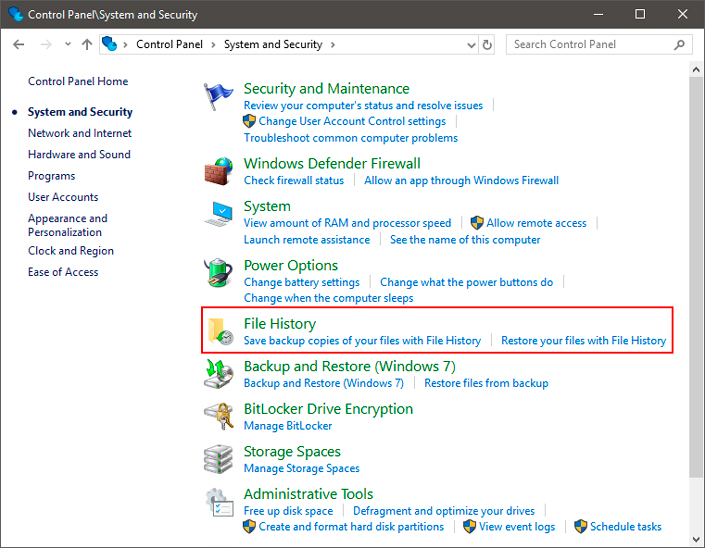
As you can see, the application is disabled by default. This is probably done in order to allow the user to personally decide what to do with his files.
It is important to note the fact that the high popularity of SSDs and the lack of knowledge about the activity of such copying could lead to a extremely fast “burning” of the solid-state drive. Therefore, Microsoft has decided to leave the decision to activate File History on the responsibility of its users.
How to enable File History?
1. Using the instructions above, open the utility window.
2. Press the Enable button.
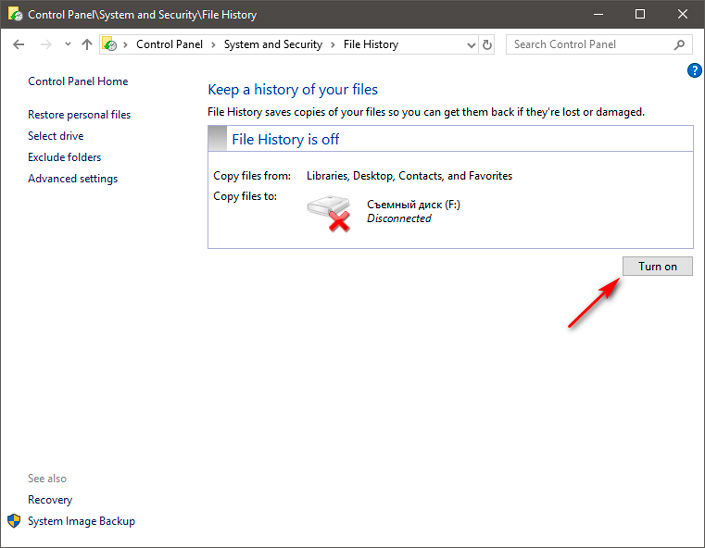
There are a predefined set of elements in File History that will automatically be copied by default: these are all your libraries (documents, music, videos, etc.).
The concept of this application is as follows:
After making a backup of any file and after over time changing it on your computer, you can always restore the old version of the document, thereby rolling back any corrections made.
So we backed up the files. How can they be restored in case of unexpected removal?
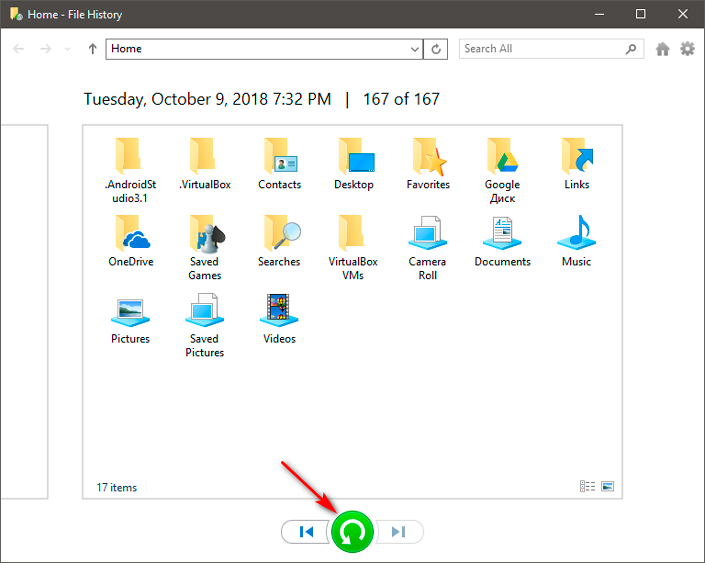
1. Without leaving the activation menu of the File History application, click on the Without leaving the activation menu of the File History application, click on the Restore personal files option.
2. Highlight several saved folders or leave them unallocated to restore all files.
3. Click the big green button below to start the recovery process.
Note:
If you do not specify the default path, then click the green button with the right mouse button and select the Restore to option, specify the path and bring the documents back to life.
OneDrive Cloud Storage
OneDrive is a service provided by Microsoft that acts as a cloud storage for all your data. The service offers users a simple way to store, synchronize and share documents of any type with an unlimited number of people (of course, if you give them access).
Windows 8. 1, Windows 10, Windows Phone, and Xbox One use the OneDrive cloud to synchronize system and visual settings, application settings, and even Internet Explorer and Microsoft Edge bookmarks. Files stored in OneDrive can be accessed using a web browser or directly from the operating system itself, if you are a Windows 8.1 or Windows 10 user.
This service is an incredibly effective solution for backing up important files, because you are no longer constrained by the physical space of your hard disk or Flash drive. While using OneDrive, you deposit your data to reliable Microsoft servers. For this reason you can maintain absolute peace of mind, because now your files are completely safe and accessible to you – just connect to the Internet.
If you are using Windows 10, the process of working with OneDrive is incredibly simple and does not require installation of OneDrive application. Simply connect the service in parametres and when later you launch the Explorer (Win + E) you will find a new parameter, which will be located in the left menu next to the list of logical partitions.
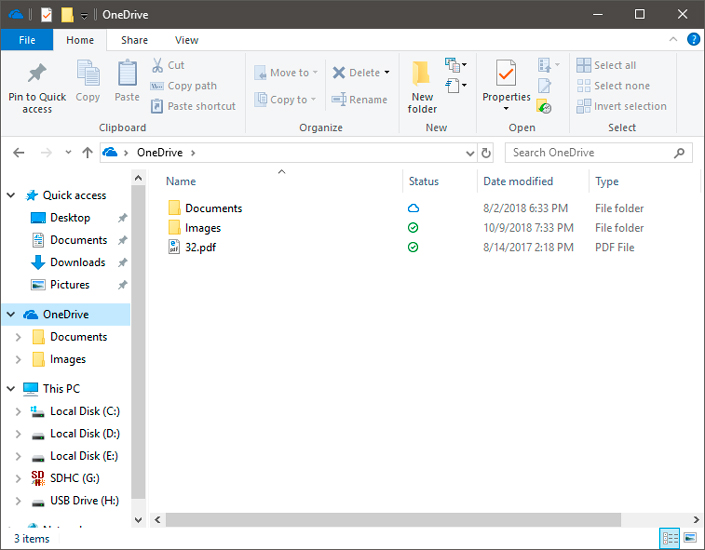
To copy the desired document to the cloud, transfer it to the cloud storage and it will be saved automatically.
System files recovery
It’s not so terrible to lose a favorite image for a desktop than to face an unexpectedly deleted system file, that may result in Windows improper functioning. Such a situation can lead not only to instability, but also to a complete failure of the operating system. Regardless of the cause of the incident, you need to start solving the problem as soon as possible.
Method 1. SFC utility
1. Run a command prompt as administrator.
2. Enter the sfc / scannow command.

3. Wait until the end of the recovery and restart the computer.
Method 2. DISM utility
This utility will help you if the SFC is ineffective. The difference between DISM and SFC is that it works directly with the Windows image. Thanks to this feature you are able to recover deleted system files.
There are three basic parameters for working with DISM: CheckHealth, ScanHealth and RestoreHealth. Let’s look at them in action.
1. Run a command prompt as administrator.
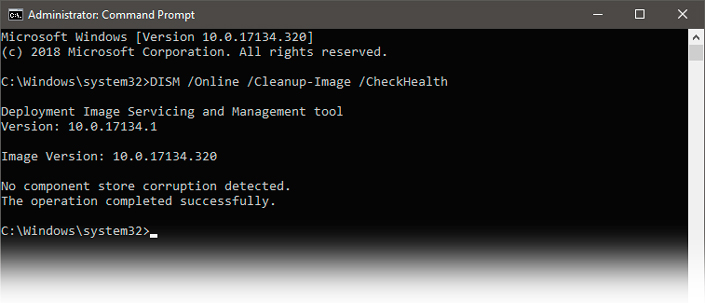
2. Enter the following command to verify the integrity of the Windows image: DISM / Online / Cleanup-Image / CheckHealth.
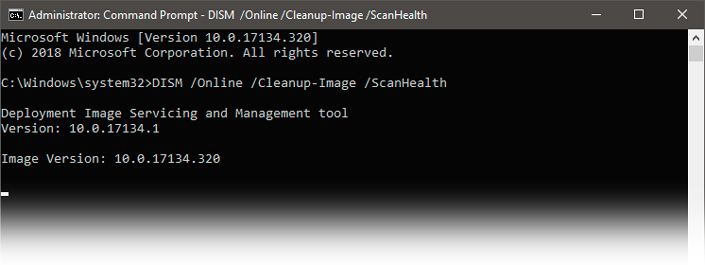
3. Now enter the command: DISM / Online / Cleanup-Image / ScanHealth. This check is deeper and can take from 5 to 10 minutes so be patient.
4. Enter the command: DISM / Online / Cleanup-Image / RestoreHealth. That will allow to carry out procedure of automatic recovery of an operating system. The process takes some time.
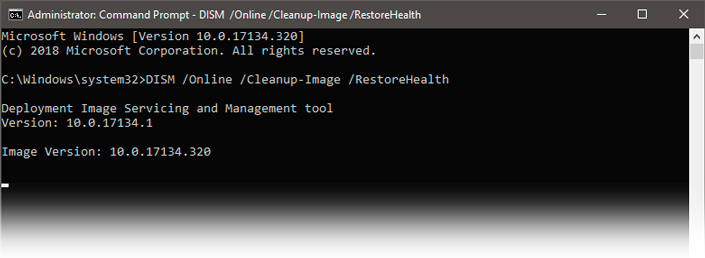
When Windows recovery is complete, restart the computer.
Method 3. Third Party Software
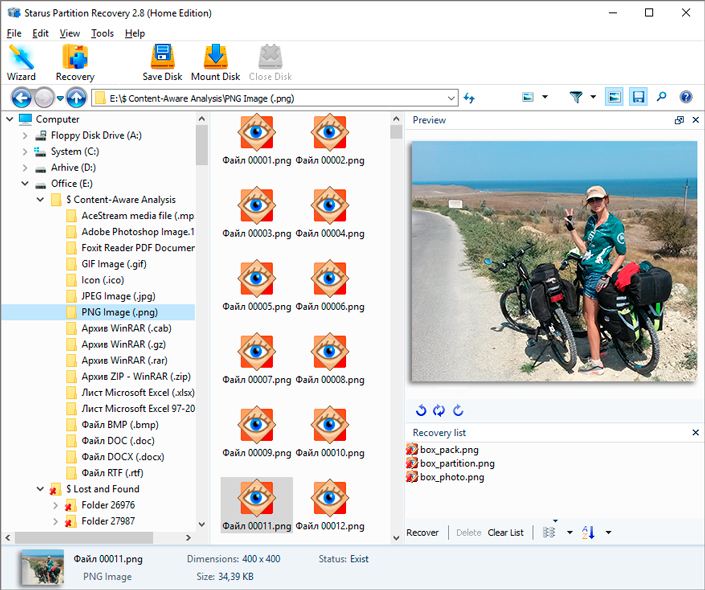
If none of the above methods helped you, we recommend trying the Starus Partition Recovery application or its cheaper counterparts Starus FAT Recovery and Starus NTFS Recovery.
The programs have an intuitive English interface and allow you to quickly recover a file of any format without the need to study complex manuals. These applications will recover your files that were lost after virus attacks, software crashes, emptying the recycle bin, formatting or deleting a disk.
You can conduct a quick scan to identify the latest installed files, and a deep one, which will make a thorough analysis of each sector of the hard drive and will allow you to recover even the oldest documents. A convenient preview function allows you to pre-examine each file, saving you from having to restore everything – you can restore only the materials you really need.

Recover Deleted Files and Repair Corrupted Partitions
We hope the article was useful and helped you to find answers to the questions posed.



If you have something to add to this material or would like to share your personal experience with restoring data in Windows 8/10, please leave a comment!