In this article we will talk about Windows Recycle Bin, how to adjust its size on different disks; why some files are deleted in recycle bin without the possibility of direct recovery; how to “cure” an infected Recycle Bin; and, finally, the most important thing is how to restore accidentally deleted files.
Every day an incredibly large file flow is passing on our computers. Someone is working with office documents, while others work with different sorts of materials from various trackers.
Regardless of what we work with, sooner or later the disk space becomes clogged up and there is a need to clear the boot folder. In this situation when you need to delete hundreds of unnecessary files, leads us to the fact that we accidentally delete the desired document.
This situation is not the most pleasant, especially if there was a deletion of the working presentation you have been preparing during last two weeks. Is it possible to return back to the moment when the important file was intact, safely and peacefully stored on the desktop or any other folder? The answer is – yes! It is definitely possible!
What is a Recycle Bin
Every Windows user will inevitably encounter this utility immediately after installing a fresh operating system. That happens because of an exceptional importance for the file system and users who unintentionally deleted a particular document with the help of the well-known Del key.
So what is a Recycle Bin?
Windows Recycle Bin — is a folder or directory for temporary storage of all the deleted files. No document is permanently deleted from the hard disk. Instead, it is sent to a Recycle Bin to further assess the situation by the user and make the last decision – to delete the file or leave it. The exceptions are the documents that exceed the allowable amounts of information stored in the memory of this utility.
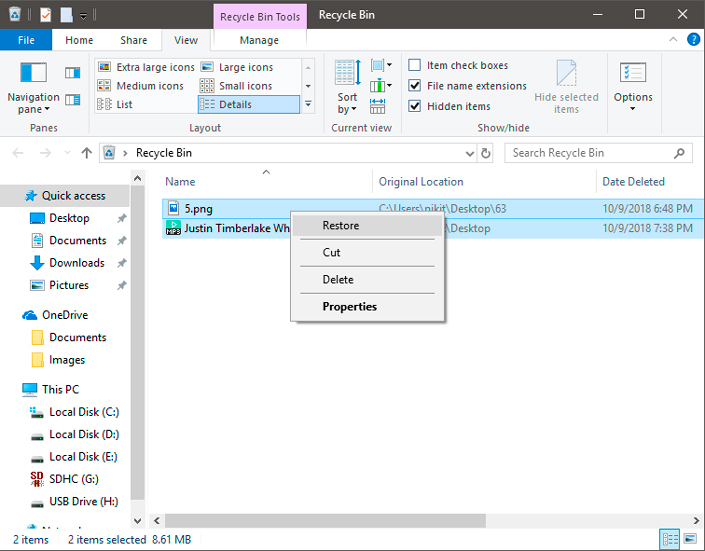
Fortunately, the file placed in to Recycle Bin can always be restored by running the application and clicking the right mouse button and pressing Restore button. If you want to restore several documents, select them all and repeat the described above algorithm.
Note:
The files in the Recycle Bin considered as “deleted”, so they do not work.
Customize the size of the Recycle Bin on different disks
Some users have to deal with large files that could be deleted, but it is still unknown whether they will be useful in the future or not. In this situation a useful property of the Recycle Bin will help you to expand the volume of its storage in a timely manner.
What is it for? This feature is designed to help users avoid accidental file loss by deleting it bypassing the recycle bin. After all, it simply ignores the document, exceeding the storage limit and deletion will be permanent.
Let’s take a closer look at the process of increasing the volume of the Recycle Bin on different disks. It is simple to perform and does not take much time.
1. Open the Recycle Bin properties.
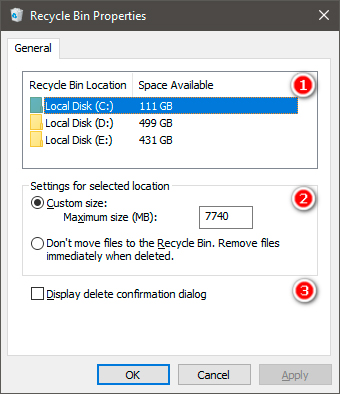
As you probably noticed in the image above, this window displays the following parameters:
Memory volume
Volume indicators of all hard drives or logical partitions connected to the device.
Parameters for the selected location
Here you can specify the size of the Recycle Bin for the selected drive (in our example, the C: drive is highlighted). If you wish, you can disable the b Recycle Bin functionality. However, in this case files will always be permanently deleted.
Request delete confirmation
Usually, if you delete a file from the Recycle Bin, the system does not require additional confirmation of the action, since it considers this utility as the last station before the document is completely deleted. However, to avoid accidental deletions, you can make this parameter active.
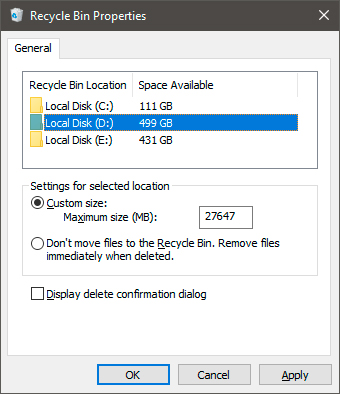
2. Switch to a different logical partition and configure the new custom Recycle Bin values.
Deleting files bypassing the Recycle Bin
Every situations has two sides of the coin, the positions from which one or another issue can be considered with completely different opinions, and the parameters of the Recycle Bin are no exception.
As we discussed above, in the properties you can always choose the option “Don’t move files to the Recycle Bin. Remove files immediately when deleted”. In this case, any file to which you apply the Delete command with the right mouse button or using Delete key on the keyboard will be permanently deleted. Be careful using this parameter!
An alternative way to delete a file bypassing the recycle bin is to use the Shift + Delete key combination. A quick command in case you are 100% sure that the selected file is no longer needed and can be deleted without unnecessary fears.
It is important to note and remember one moment, which, due to ignorance, cost many users the loss of valuable family photos, videos or other documents:
When deleting a file from a flash drive or a memory card, erasable folders and documents do not get into the recycle bin — they get completely destroyed. The reason for this is that the “Recycle Bin” is an element of the Windows file system. Accordingly, it works only with it, in no way affecting other storage devices.
Unable to restore file from the Recycle Bin. What to do?
One of the possible reasons why you cannot recover the file placed in the recycle bin is internal damage to the utility itself or its infection with a virus. In this case, when you try to bring the document back to life, you may receive the message “File is corrupted”, which fully prevents any normal operation.
How can I fix the “Recycle Bin” error? Let’s look at the example below.
Method 1. Command Line (CMD)
1. Open the Start menu.
2. Enter CMD or Command line in the dialog box.
3. Run the application as an administrator.
4. Enter the following command: rd /s /q C:\$Recycle.bin
5. Press Enter key.

6. Now restart the computer.
If this command did not help to resolve the issue and to correct the error that occurred, try the alternative method via the command line:
sfc /scannow

Method 2. Remove all the permissions
1. Open the Control Panel..
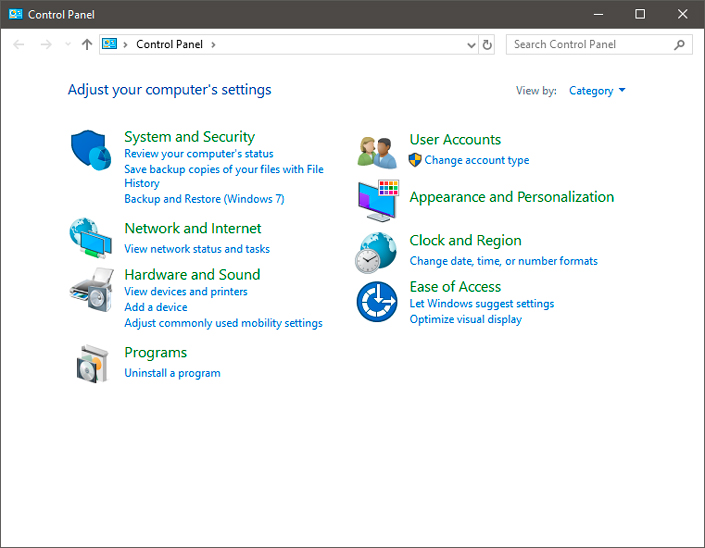
2. Find Explorer Options. You can easily find it by typing it in the dialog box to the right.

3. Open the options window.
4. Go to the View section and uncheck the Hide protected system files option.
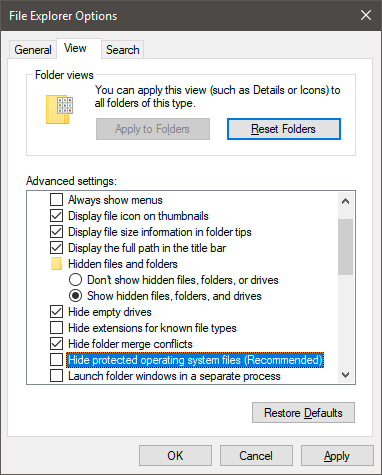
5. Click Apply button.
6. Now, in each logical partition, is displayed a new folder called Recycle.bin.
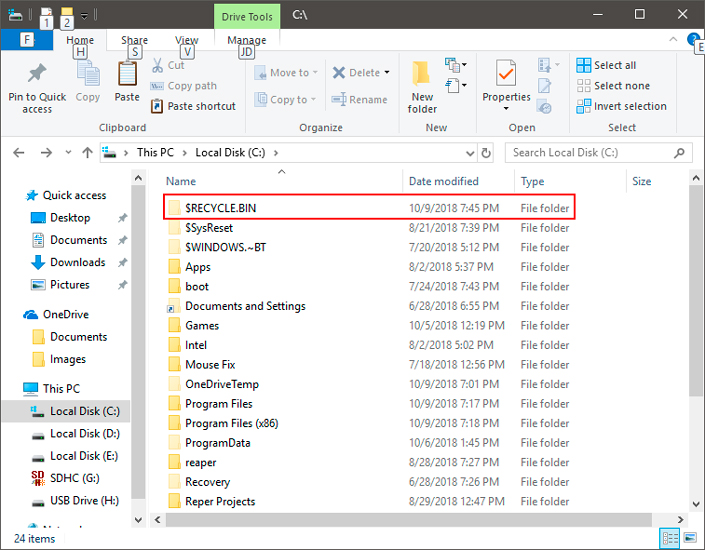
7. Delete all the Recycle.bin folders and restart the computer.
Do not rush to leave! Now we need to reinstall the Recycle bin.
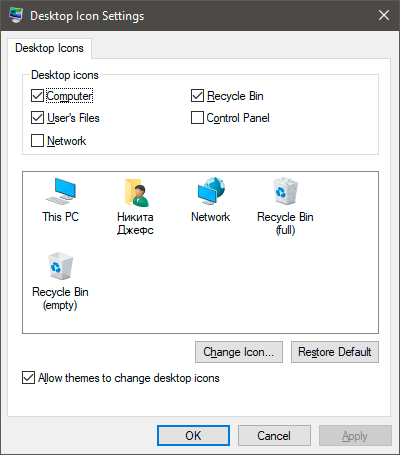
1. Right-click on the desktop and go to the Personalization section.
2. Go to the Themes section and open the Desktop icons settings window.
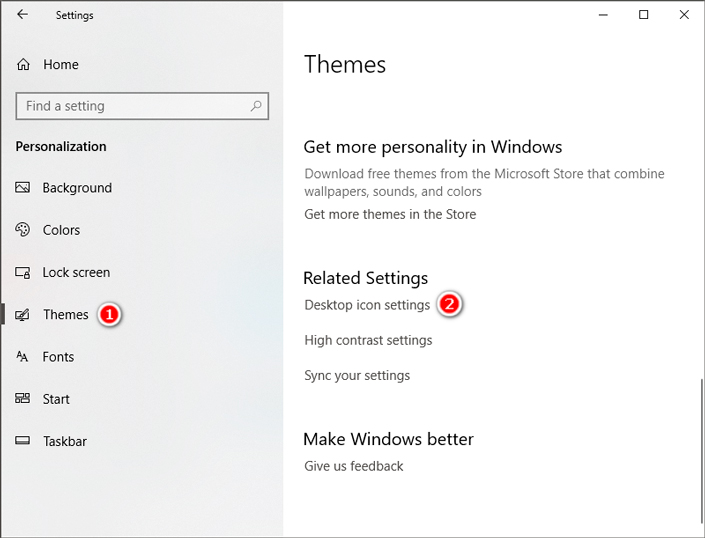
3. Restore the Recycle bin to its original location.
Recover deleted files
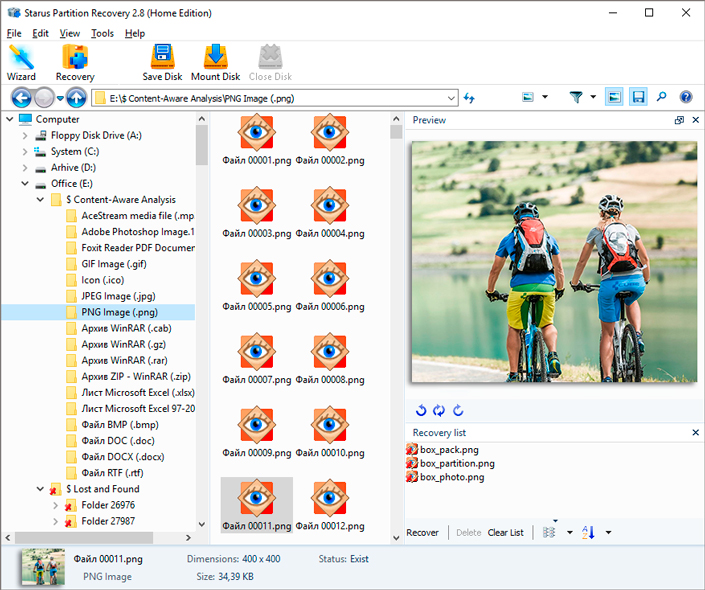
It is not always possible to recover deleted files in the usual way – by restoring them in the recycle bin. They can be lost either as a result of accidental deletion using the Shift + Delete key combination, or they can be deleted by a virus or in case of a hard disk failure.
Regardless of the reason for the loss of documents, it is important to remember that they can always be restored. An exception may be only those files or folders that were subject to overwriting.
What does it mean? Any document installed on a computer cannot disappear without a trace. Deleting it in the usual way, you simply force the system to “forget” the path to a file and to stop using it.
However, while installing new applications on your computer, there should be the risk of permanently losing everything that could have been restored otherwise.
Note:
Never install new programs on your hard drive if you want to restore lost files safe and sound.
The Starus Partition Recovery application and its cheaper analogues Starus FAT Recovery and Starus NTFS Recovery will be a good choice for office use, in case of losing valuable documents, and for home use in case of losing expensive family photos.
The program has a simple intuitive English interface and will allow you to feel comfortably without the need to study complex manuals. These benefits will allow you to effectively recover any lost file and significantly save your personal time.
We hope the article was useful and helped you to find answers to the questions posed!



If you want to add something to the material or want to share your personal experience of recovering deleted files on your computer or laptop, please leave a comment!