Read this article to find out how to upgrade an old laptop if it gets too slow, how to install an SSD or add more RAM, replace an old CPU with a more powerful i7 processor, and add a Bluetooth module.

At times, every laptop user may notice that their device is no longer capable of handling everyday tasks. These may involve watching videos on YouTube, playing computer games, or working with an office software package. Most of the time, the main reason for the reduced performance is trivial overheating of the mobile computer due to its being clogged with dust. As frequent as it is, this reason is not the only explanation, and if your laptop is pretty old, cleaning it can hardly solve the problem.
In this article, we are going to describe the process of upgrading an Acer Aspire 7750 laptop, which features a 2nd generation i3 processor (2 cores, 4 threads) and integrated graphics. In this configuration, the laptop’s performance is miserable, it is overheating, has difficulties with playing Full HD (1080p) videos, and can’t handle Full HD 60 fps videos at all.
What laptop parts can be upgraded
The first thing to be done is to take it apart, clean it from dust, and replace the thermal paste for the CPU heatsink.
If the laptop starts with its cooling fan working at full speed as if you launched a resource-intensive application, and the processor temperature rises to 80 degrees Centigrade and higher, it means that the cooling system can’t do its job properly. In addition, the core frequency of the integrated video chip is also decreasing.
As we have mentioned before, this problem becomes especially demonstrated when trying to watch Full HD videos. Another consequence of the overheating is when the laptop shuts down on its own, suddenly and without any warning.
The second is to boost the laptop’s performance and speed up its booting. This can be achieved by adding an SSD and installing the operating system there, and by using more RAM with higher frequencies.
The third step is to improve overall performance of the laptop by replacing its CPU with a newer model having higher frequency and more cores, with hyper-threading and turbo boost support. Combined with an ample processor cache, all these features will certainly give a boost to the old laptop.
Finally, the last thing is to replace the obsolete Wi-Fi module with a new one which also supports Bluetooth. This way, you can remove one more adapter sticking out of the USB port and save that port for a more important device.
While the first two items on the list are not too difficult to do, the third one can be a challenge. Actually, the main purpose of this article is to help you find your way about it.
Compatibility requirements for PC parts
To make sure that all computer parts you are going to buy will work properly together, there are three requirements to be met:
1. The socket on the laptop’s motherboard should only be of the PGA type.
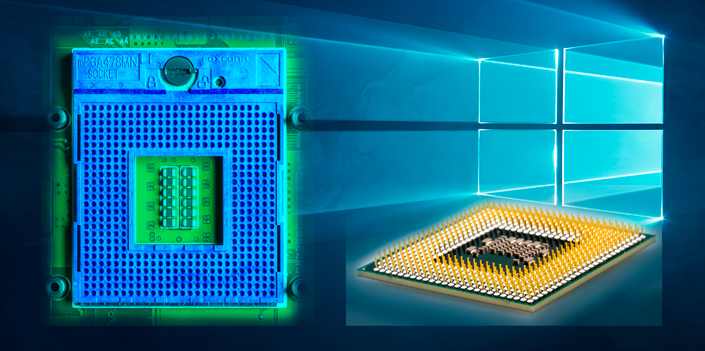
The matter is that BGA type (ball grid array) suggests soldering, and such operations can only be performed at specialized centers that have the required equipment. At this stage, you have to consider the high price of such operation, and if it’s worth to spend so much to upgrade this particular laptop.
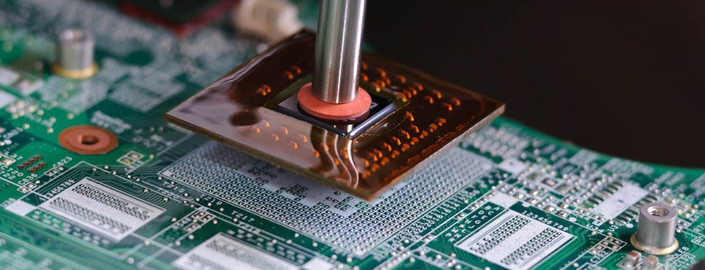
2. The chipset and the CPU should be compatible. A chipset is a set of micro-circuitry (a set of electronic components in an integrated circuit) that can be found in any PC, be it a laptop or desktop machine. It is used to ensure interaction of all devices connected to the motherboard.
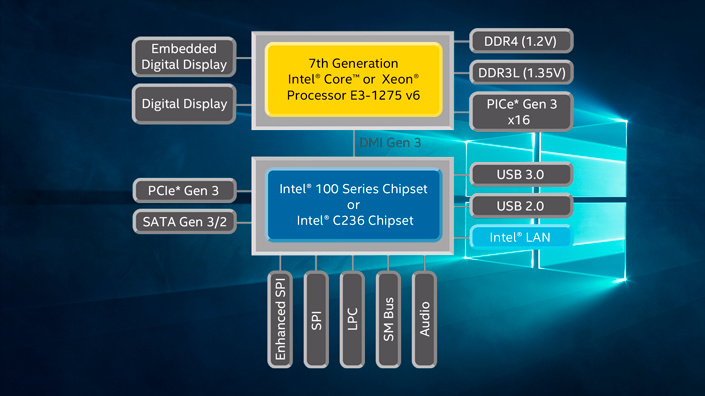
3. The BIOS of your motherboard should support the CPU you have chosen so that it receives sufficient power supply to operate. Information on processors and specific requirements can be found in their manufacturers’ websites.
Meanwhile, we are going to explore in detail how to select a processor for a laptop; for illustration, we will be using an Acer Aspire 7750, aka Packard Bell LS11HR.
How to choose a CPU wisely for a laptop upgrade
There are two ways to select a suitable processor:
The first variant is the most reliable but not too productive: select one of the CPUs from those that were installed into newer laptops of the same model.
The second variant is a bit more complicated and has certain aspects to consider, but it’s more effective in terms of getting more performance from the upgrade.
I will describe each one in detail.
Variant 1.
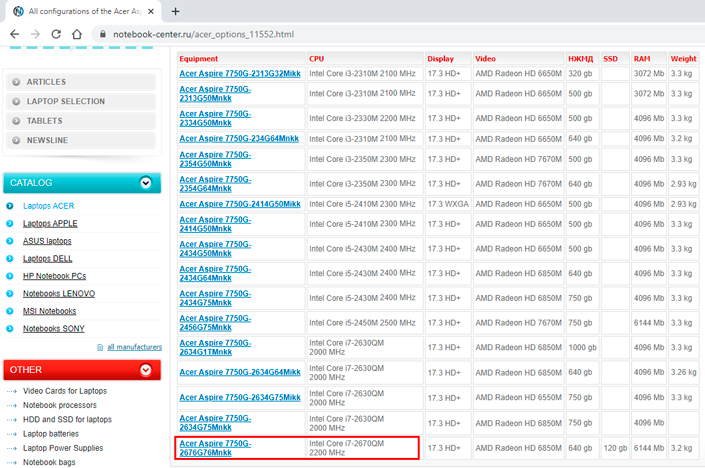
Type in the search field: ALL LAPTOP CONFIGURATIONS + YOUR LAPTOP MODEL. In case with Acer Aspire, go to the website notebook-center.ru
On the list of models, you can see that the top configuration for a laptop like this is built around Intel Core i7-2670QM at 2200 MHz. It means that there is a 99% chance your laptop will work with this CPU.
However, if you want 100% compatibility, you will have to update BIOS too. This is because BIOS contains the list of all supported devices (known as Whitelist), and it is possible that at the time of producing your laptop, this particular processor i7-2670QM was not included into Whitelist yet.
Also, BIOS may contain data on supported technologies and additional instructions. These, in their turn, determine if you can enjoy the benefits of turbo boost (that is, if the core frequency changes depending on how intensively the CPU is used). Also, the Whitelist indicates support for specific RAM modules. For example, the processor supports 16 GB of RAM at 1600 MHz, but in fact it can only handle 8 Gb at 1066 MHz, unless BIOS is updated.
A bit later, we will describe how to update BIOS correctly, but now let’s explore the second way of choosing a CPU.
Variant 2.
This strategy involves choosing a CPU by the specifications you know: its socket, architecture, chipset and power consumption (TDP, Thermal Design Power). To find out all the data we need, we will use a utility called CPU-Z, or even better, try AIDA64. They will give us the information we should have to make the right choice.
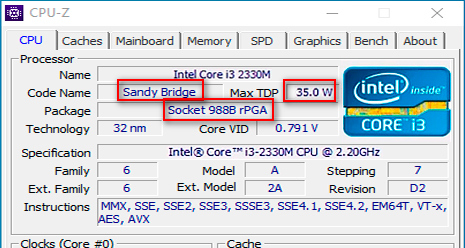
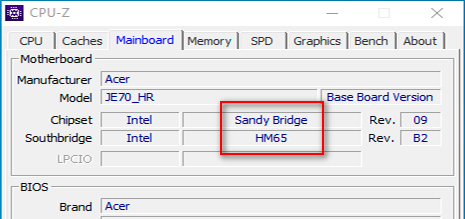
So, here is what we’ve got:
- 988 rpga socket;
- Sandy Bridge architecture;
- the TDP of 35W;
- hm65 chipset.
Now let’s google hm65 chipset.
Find the website cpu-upgrade.com (Intel® HM65 Express chipset for mobile computers) and follow the link.
Now select your i3 processor and follow the link.
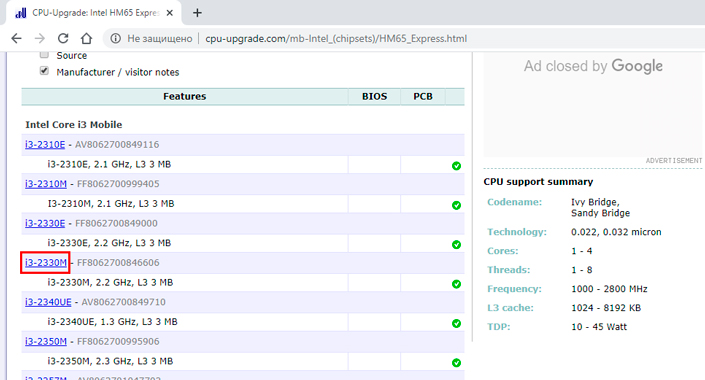
In the page that opens, you can see the list of processors to which it can be upgraded.

The more reliable way to select a processor is to use the link provided by AIDA64.
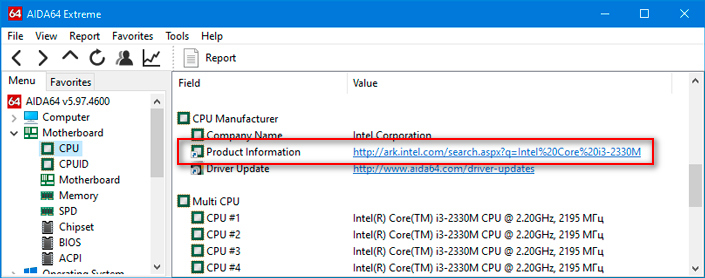
And if you do it, you can skip the stage of googling lots of data. Open the website ark.intel.com, https://ark.intel.com/content/www/us/en/ark.html?q=Intel%20Core%20i3-2330M), and navigate to Processors > Intel Core Processors. As our processor belongs to the second generation, select Legacy Intel® Core™ Processors.
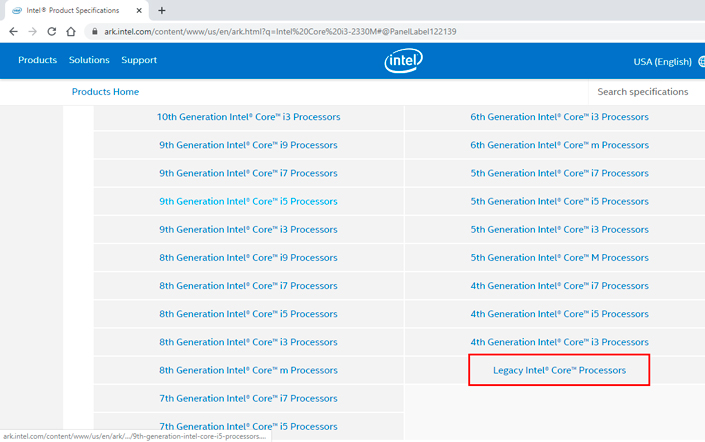
Use the “Search” feature (activated with the key shortcut CTRL+F) to find i3-2330M. Click on the CPU name and follow the link to the next page. Select “Compatible products.” Select chipset HM65 from the list and click “Compatible products” again.
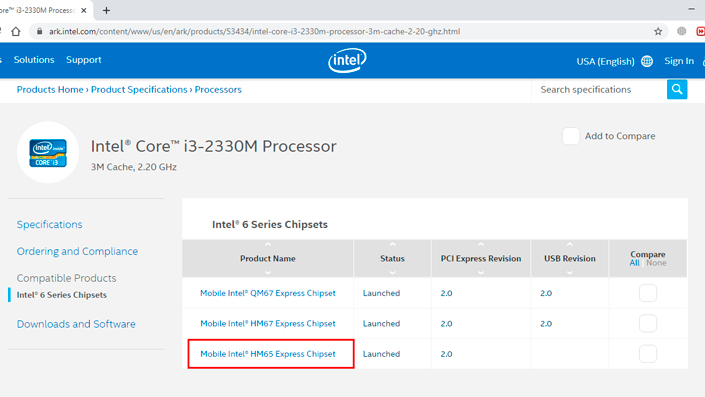
On the list of compatible products, find i3-2330М and check the box on the right. Now select i7 processors you are interested in. Compare them by clicking the corresponding button above.
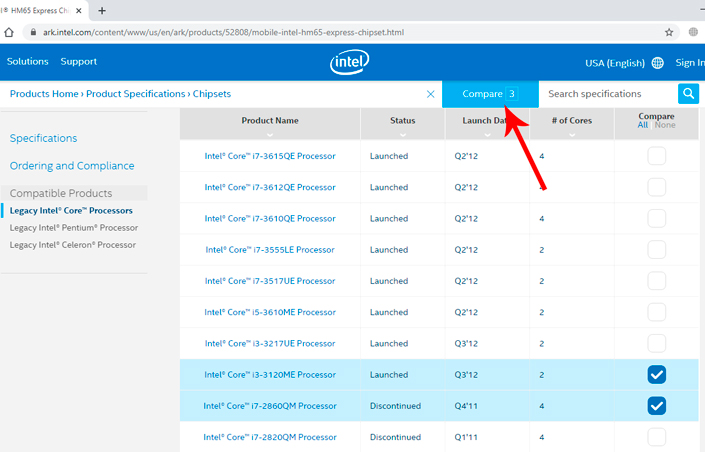
For comparison reasons, I selected the current i3, the top i7 of the 2nd generation for replacement, and an i3 of the 3rd generation – this one is chosen specially to show you why it doesn’t satisfy our needs.
Scroll down to see all specifications for every CPU and compare them.
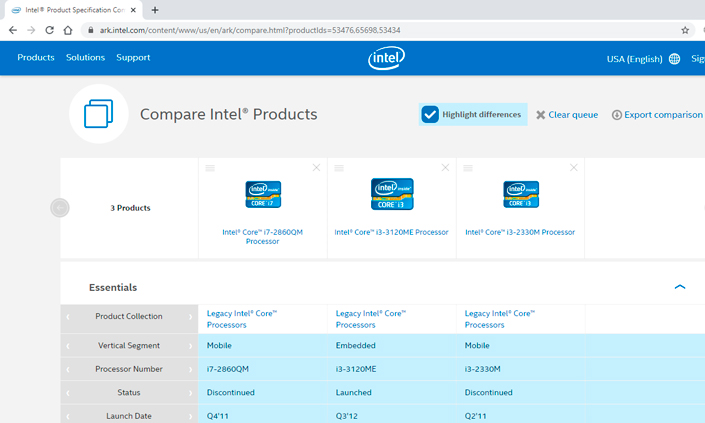
Open every processor in a new tab and make sure that each of them suits our requirements.
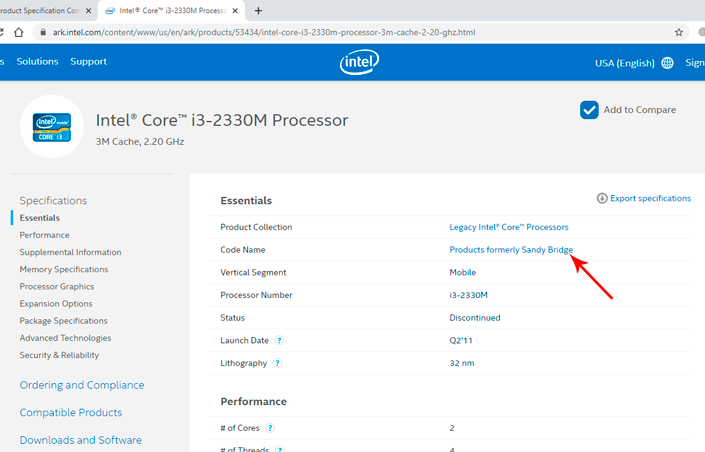
I3-2330М supports the Sandy Bridge architecture.
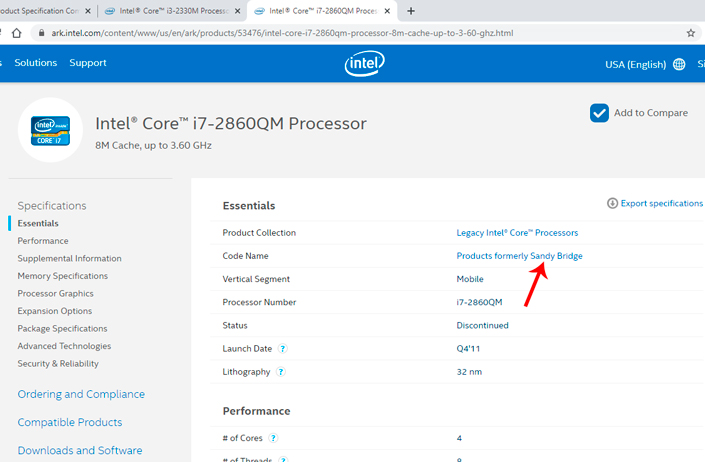
I7-2860 also supports Sandy Bridge.
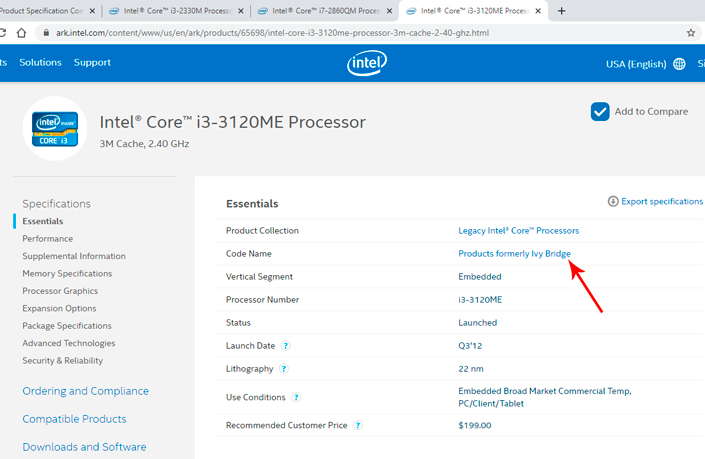
But i3-3120M doesn’t support it, because it is based on Ivy Bridge. You can remove it from the list without any hesitation.
My choice for replacement is Intel® Core™ i7-2860QM. The cost of upgrade is something you should decide for yourselves. I compared prices and it appeared that I can order a CPU like that locally and at a lower price than I would have to pay if I got it from AliExpress.
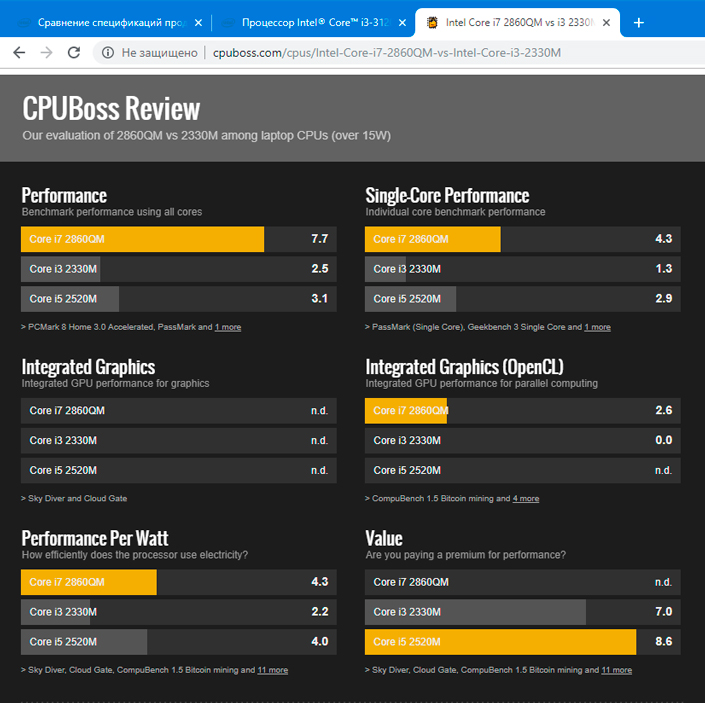
The power consumption (TDP) exceeds that of i3 – 45W. However, this problem can be solved by replacing the heatsink. A second-hand one only costs $5.
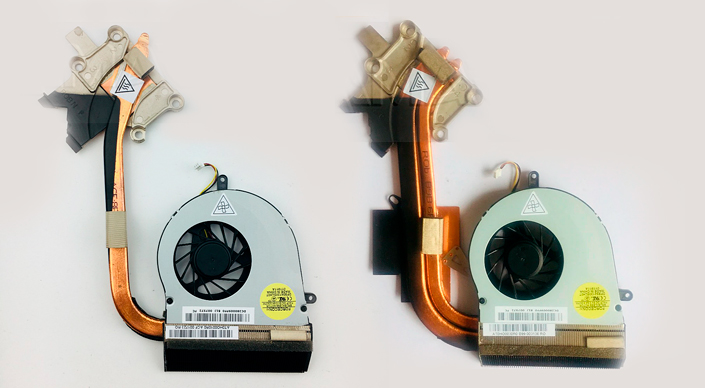
Now that we’ve sorted out the CPU issue, it’s time to update BIOS.
Upgrading an Acer Aspire 7750 laptop
Update BIOS
The update process by itself is not difficult at all, but it’s important to observe certain rules to be sure you don’t brick the hardware. If you do that by mistake, you will have to restore BIOS by unsoldering its chip and flashing it with a programming device.
Attention!
Plug the laptop into the wall socket and charge the battery full. Also, it’s recommended to disable the antivirus and close all applications.
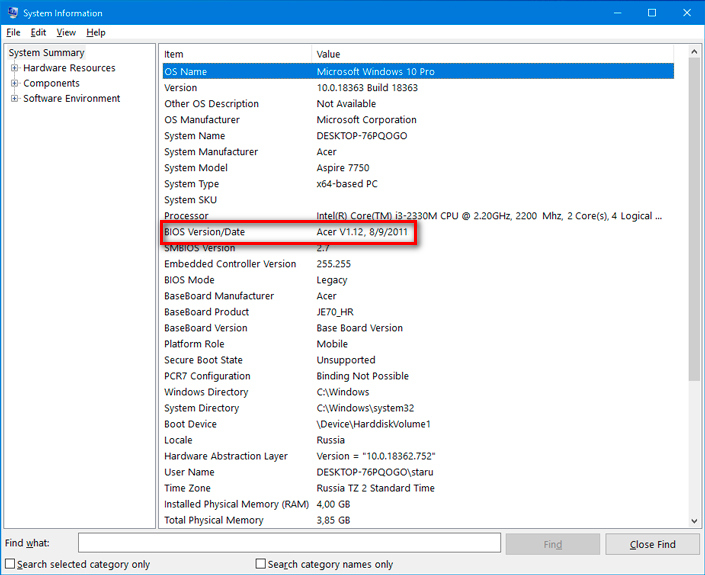
First of all, learn the BIOS version. Type the command msinfo32 in the command prompt.
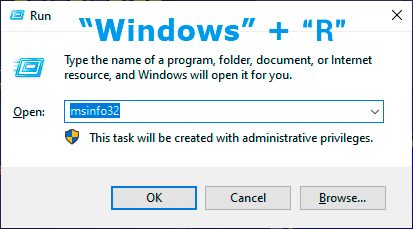
The “System Information” window will appear; the BIOS version for this laptop is 1.13. Also, you can see the version number in the “Information” tab in BIOS when the computer is booting.
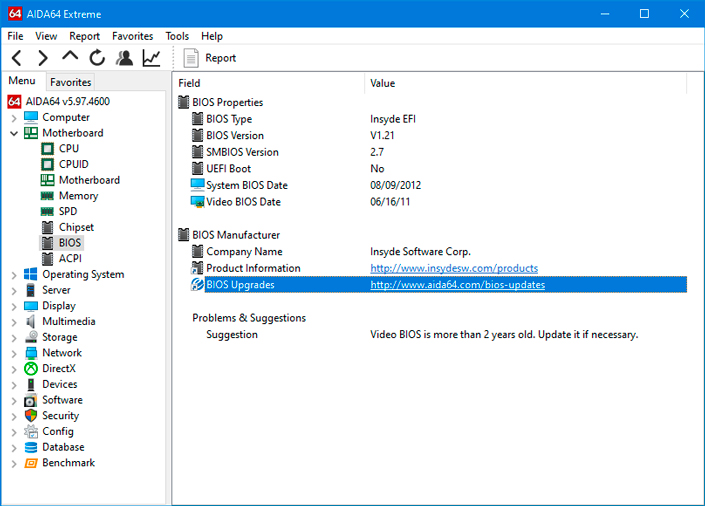
An alternative way to learn the BIOS version is to use the AIDA64 utility. There, you will also find a link to the official website of the laptop manufacturer where you can download updates. Very convenient, so we will use it.
Now you should download a file for updating BIOS and run the installer. Install updates one by one – it’s important! If our version is 1.13, then download and install the next one, 1.14 and never hurry to jump to the latest one, 1.21, immediately.
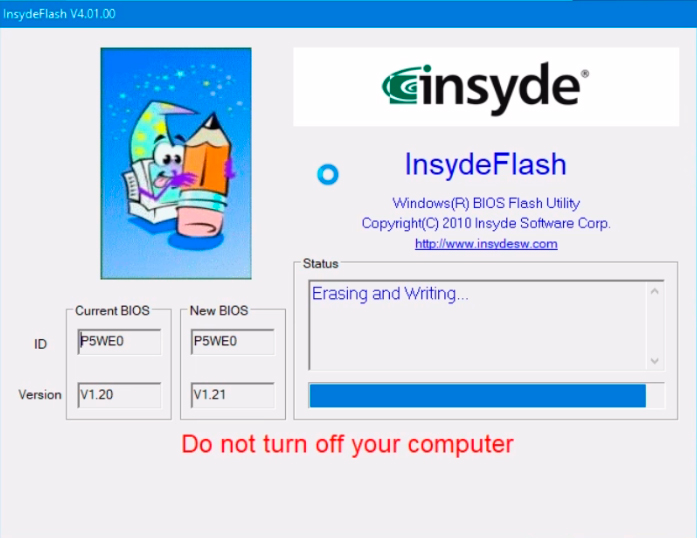
After every update, the laptop will reboot.
Now all that’s left to do is to take the laptop apart, clean it, replace the CPU and put it together again.
Before you begin, don’t forget to take out the battery!
How to take the laptop apart
1. Remove the back panel covering the HDD and memory modules.
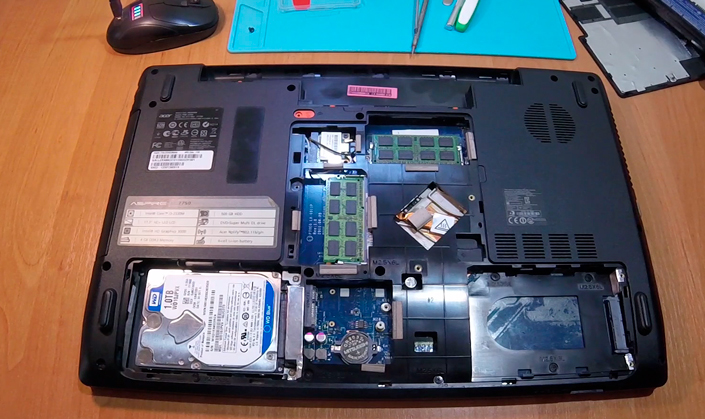
2. Take out the memory sticks.
3. Remove the HDD.
4. Get all the screws out of the bottom part of the laptop body.
5. Remove the keyboard and disconnect the cable carefully.
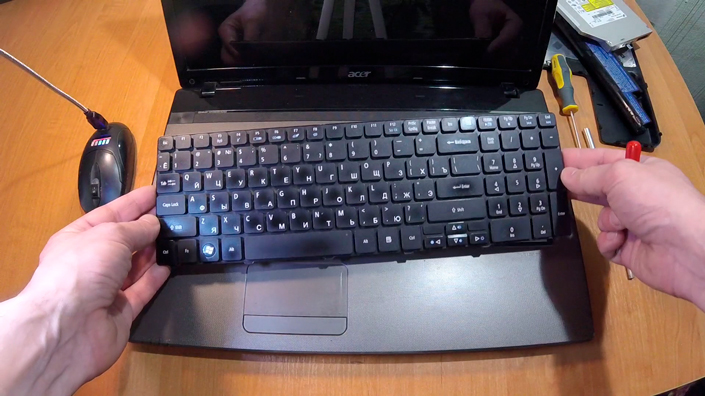
6. There are three more screws to take out and a couple of cables to disconnect. Remove all of them.
7. Open the body carefully.
8. Disconnect all data and power cables from the motherboard, and take it out.
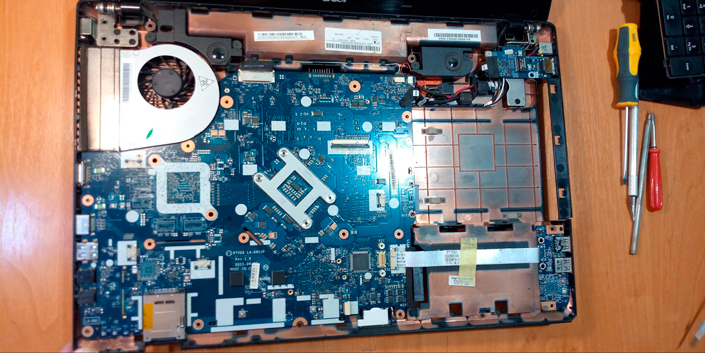
Install and clean the cooling system
Remove the cooling system to replace the heatsink. As the new processor has a higher TDP value, we replace the old heatsink with a new one with two heat pipes, which is more powerful.
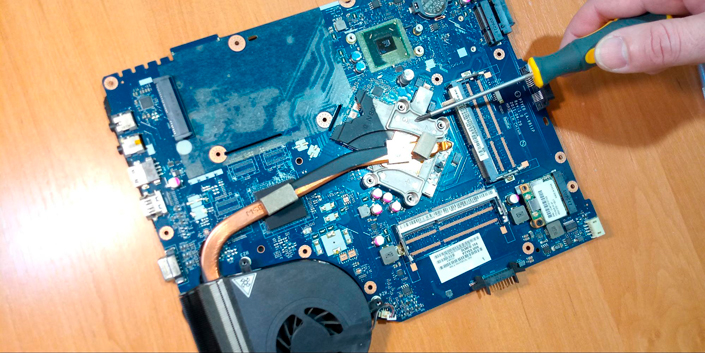
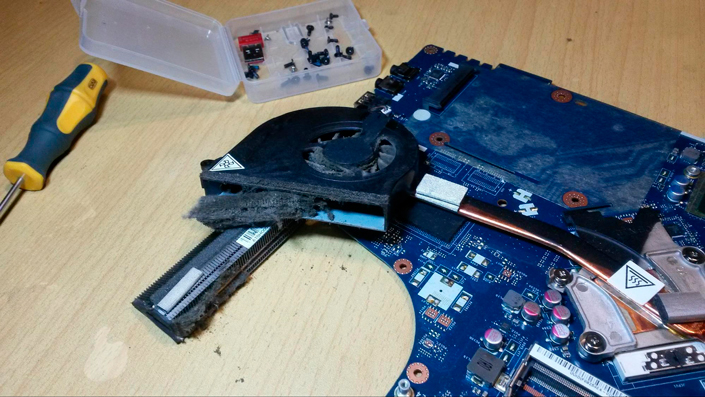
You can use small brushes and cotton buds to clean the heatsink and the cooling system. However, there’s nothing like compressed air – use an air-pressure bottle or a compressor at the nearest car service station.
Replace the CPU
In order to take the old processor from the socket, you should open the socket latch. Then put the new CPU gently into the socket, making sure that all orientation key notches fit where they should.
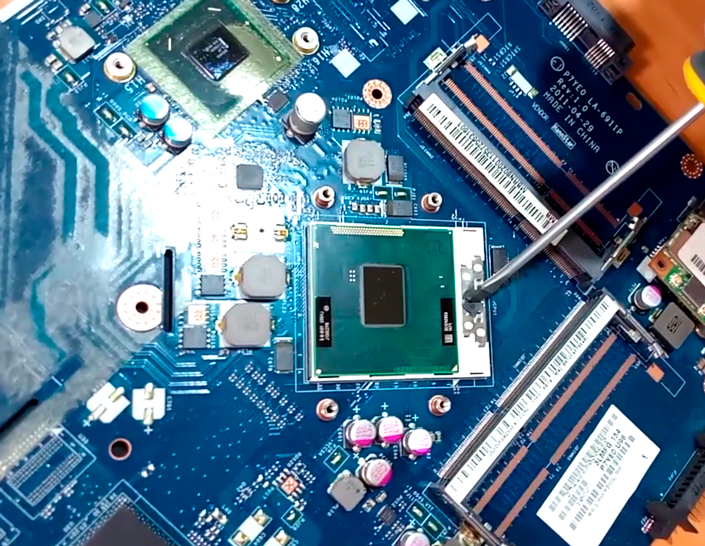
No special effort is required; if you put the CPU properly into the socket, it will slide in place easily. Now lock the processor in the socket with the latch and apply some thermal paste.
Add a Bluetooth module
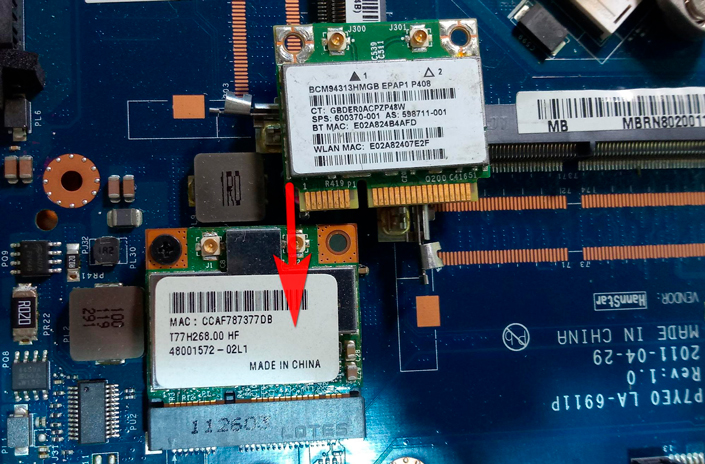
Now let’s replace the Wi-Fi module with a Wi-Fi + Bluetooth module. It looks exactly the same, but the sticker has the second line, MAC BT (that is, Bluetooth) in addition to the first line, MAC WLAN.
Now everything should be put together, in a reverse order.
Install an SSD
You should always install the solid-state drive into the slot originally designed for the hard disk and equipped with the SATA-III connector. Meanwhile, the old HDD should be relocated to an additional connector if your model has it, or into the place where you used to have a DVD drive.
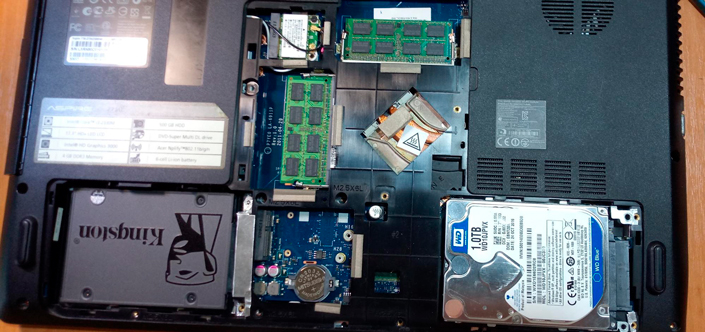
Remember, that if you plug the SSD into a SATA-II connector (and all DVD drives are connected that way), this will cut read and write speeds twice! Sometimes, when you replace a DVD drive with a Slim DVD adapter designed to hold an HDD, BIOS may not recognize the hard disk. This issue can also be fixed by updating BIOS.
Add more RAM
This laptop has two memory sticks with the frequency of 1066 Mhz. The new CPU can handle DDR3 memory modules at 1600 Mhz. So the best upgrade strategy is not about just adding more gigabytes, but about replacing the old memory with two sticks 8 GB each, with a higher frequency.
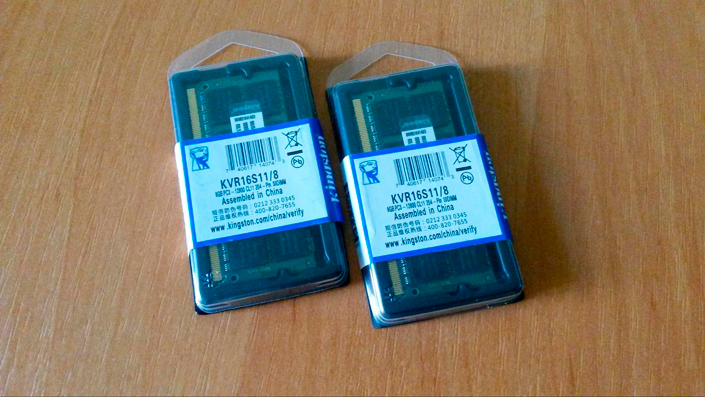
In the end, you get 16 GB of RAM at 1600 Ghz.
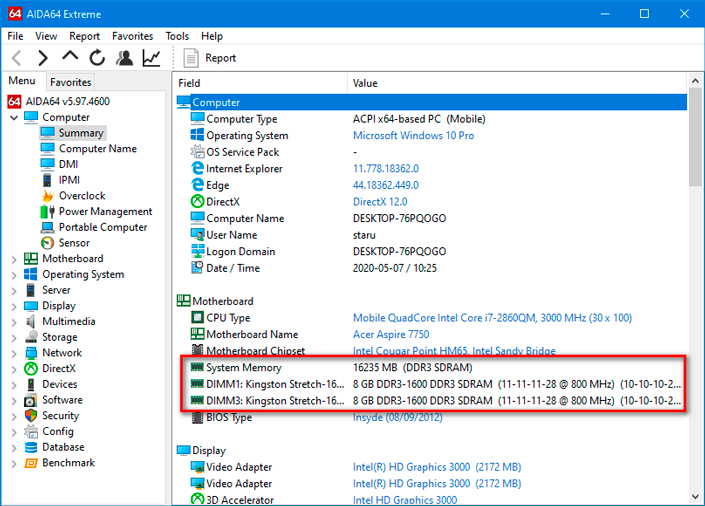
Close the back panel, insert the battery, connect the power adapter. Now, let’s try starting the laptop: if there is no magic smoke coming out, and BIOS boots all right, then install or clone an operating system to the SSD.
Start Windows, and open the Device Manager. We need to make sure that the modem and Bluetooth module are listed among the computer’s devices. Also, the graphics driver should be updated.
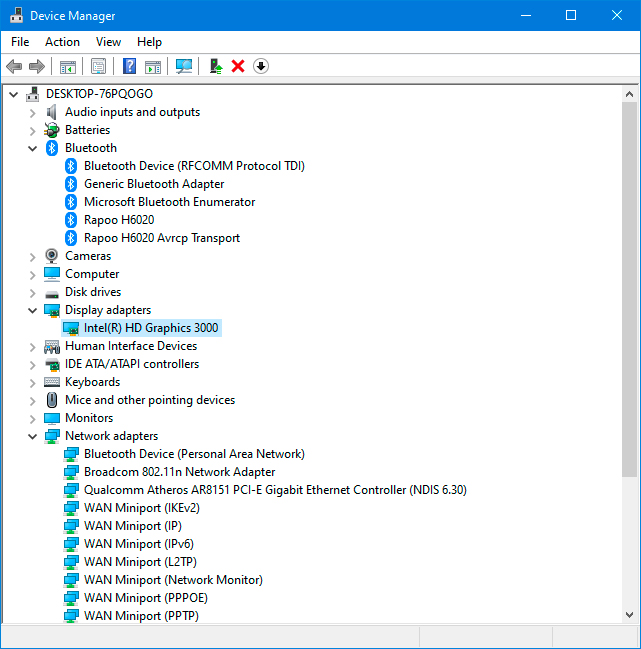
Now let’s see what we’ve got. It’s time to run a couple of tests to make sure that everything works properly, and the modernized cooling system can handle the TDP of the new processor.
Running a system stability test after upgrade
We need to run several tests to be sure that all parts and the mobile computer in general work properly and without any issues. You can do it with the same specialized app we used today, AIDA64.
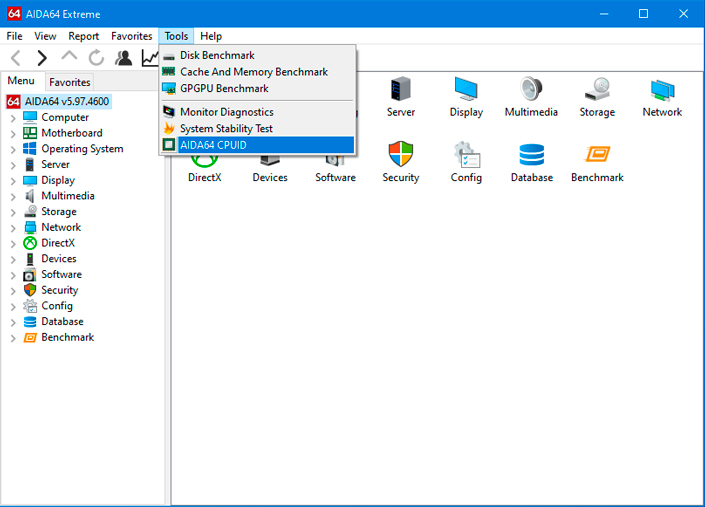
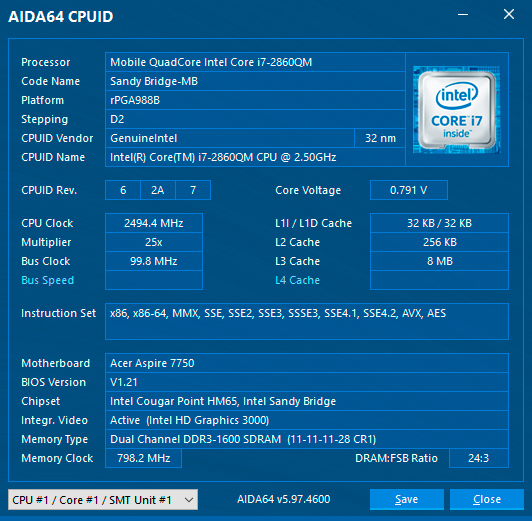
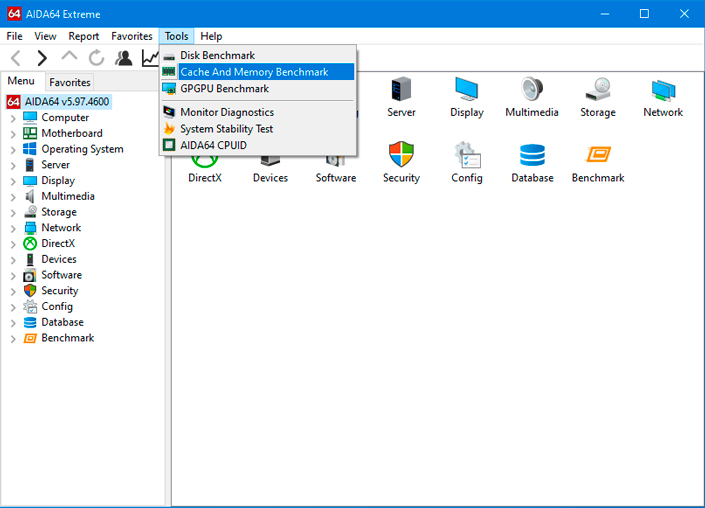
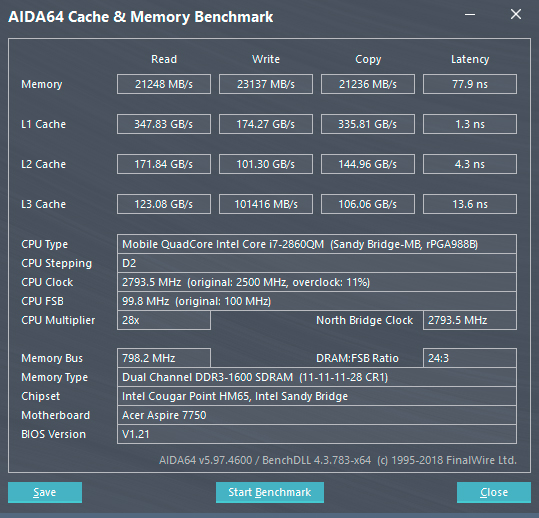
Open the tab Tools and run the following tests.
First of all, view the general information on your computer:
Cache and memory test
Now jump to the tab Computer and find the line Sensor to monitor the CPU temperature in the next test.
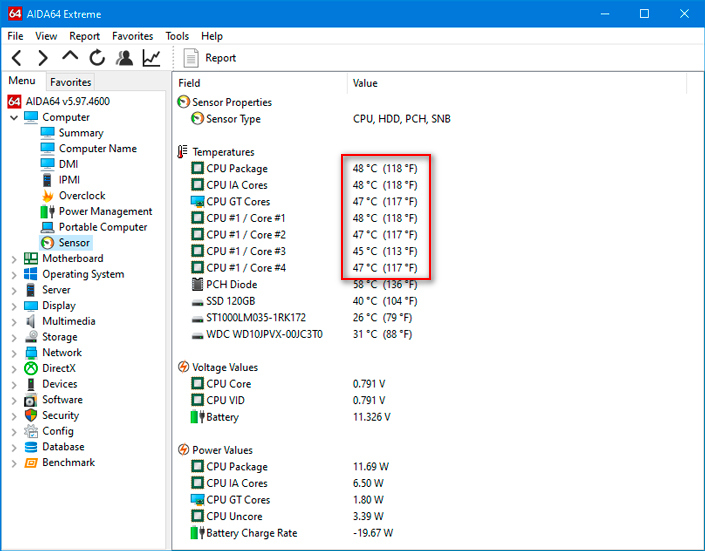
System stability test
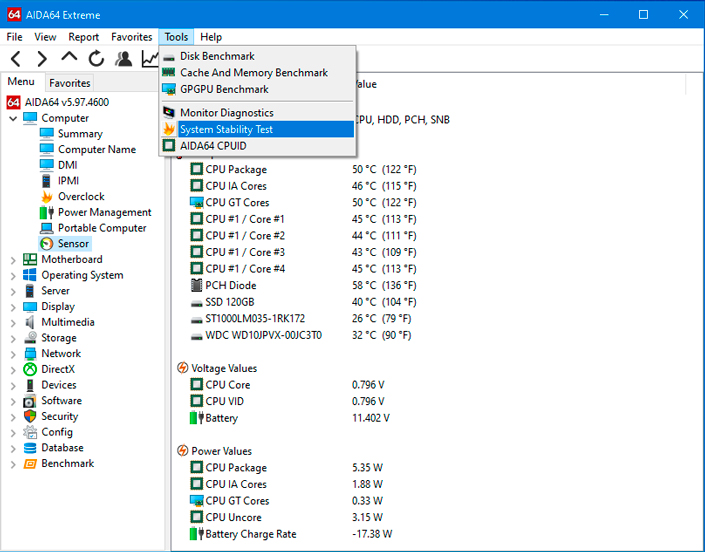

By specifications, the maximal temperature for this CPU is 100 degrees Centigrade, so the temperature level with the CPU under 100 percent load is quite acceptable.
That is all for today. The laptop upgrade was successful, so we hope that this article will help you to improve your computer’s performance too!

Do-it-yourself diagnosing, 🛠️repairing and improving a Chinese 🔌power supply unit



If you have something to add to this article or you have questions about upgrading a laptop, feel free to post a comment!
How can I make my Acer Aspire laptop faster?
1. Close Unused Programs: Close all unnecessary programs and browser tabs running in the background to free up system resources. 2. Update Drivers: Make sure all your drivers are up-to-date, as outdated drivers can slow down your system. 3. Clean Up Your Hard Drive: Remove any unnecessary files and programs from your hard drive to free up space and improve performance. 4. Add More RAM: Adding more RAM can help your system run faster and smoother. 5. Disable Startup Programs: Disable any unnecessary startup programs that are running in the background. 6. Uninstall Unused Programs: Uninstall any programs you no longer use to free up space and resources. 7. Use a Solid State Drive (SSD): Installing an SSD can significantly improve the speed of your laptop.
We know that laptop makes our life so easy because we can do anything through laptop . But sometimes laptop upgrade would be better performance for laptop. I think everyone should be follow your blog
Hello, its possible to change the motherboard Packard Bell ENNS45HR (or another option for DirectX 11) ? Thanks
Pretty first-rate post. I just stumbled upon your web page and wanted to say that I have in actuality enjoyed reading your web site posts. Any way I'll be subscribing to your feed and I hope you post again soon.